Wall and step flashing repair in Vancouver, WA
Water is showing up where a roof meets a wall or dormer, and the shingles look fine, which usually means the metal flashing behind them has failed.
- 24/7 phones
- Roof repair
- Vancouver office on Main St
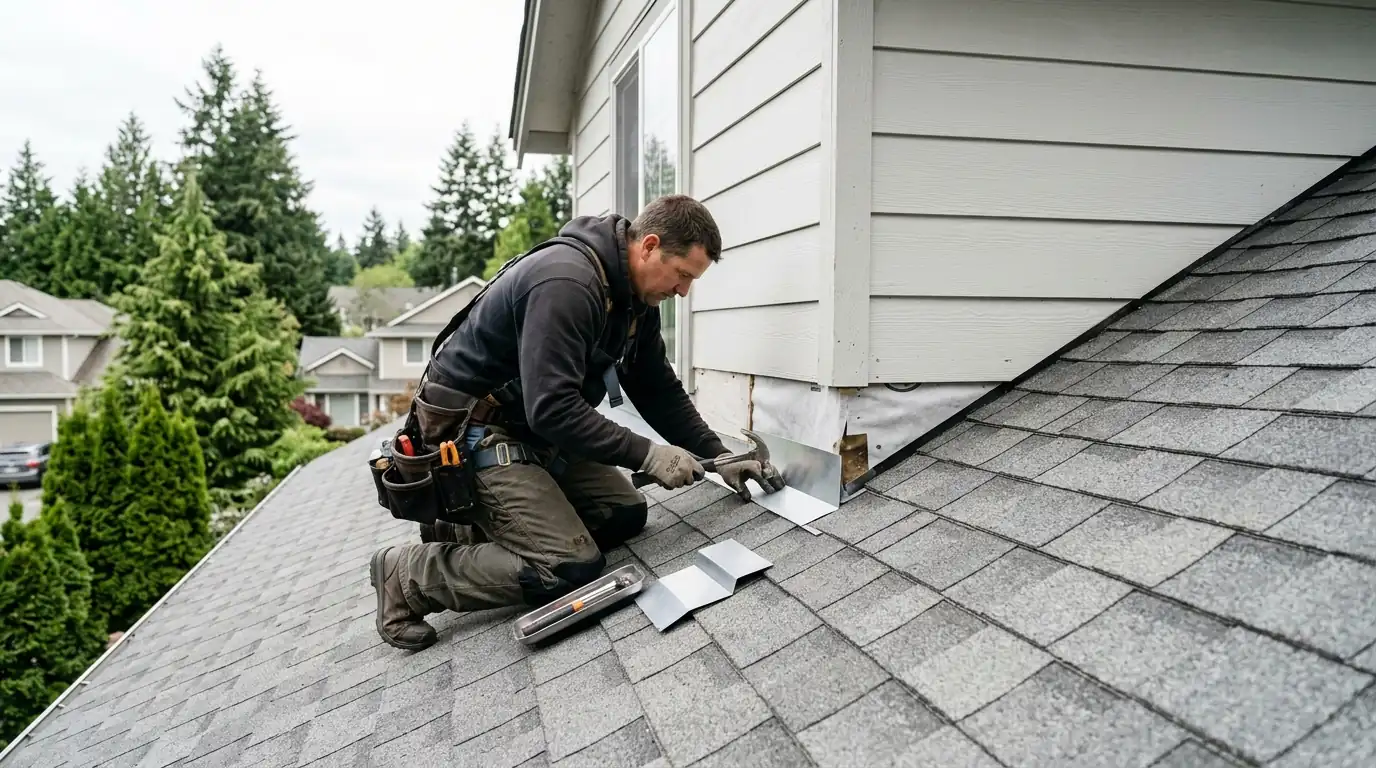
Flashing repair fixes the metal pieces that seal where a roof meets a wall, dormer or edge. In the Vancouver area, typical flashing repairs run $435 to $1,580. Most failures come from rust, missing kick-out flashing, or flashing that was bent or skipped during siding work. Proper repair means relapping the metal, not just caulking over it.
Flashing is the sheet metal that bridges the gap between the roof and anything that sticks up through it or runs alongside it: walls, dormers, porch roofs tying into the house, and the roof edges themselves. Shingles cannot seal against a vertical surface, so flashing does that job. When it rusts, comes loose, or was installed wrong, water runs behind it into the wall or attic.
This page covers wall, step, headwall, apron and drip-edge flashing. Chimney flashing has its own page because it involves masonry and crickets. Flashing repair often means removing a few rows of shingles and some siding to reach the metal, replacing it with new pieces lapped in the right order, and putting everything back so the joint sheds water instead of trapping it.
The types of flashing on a typical roof
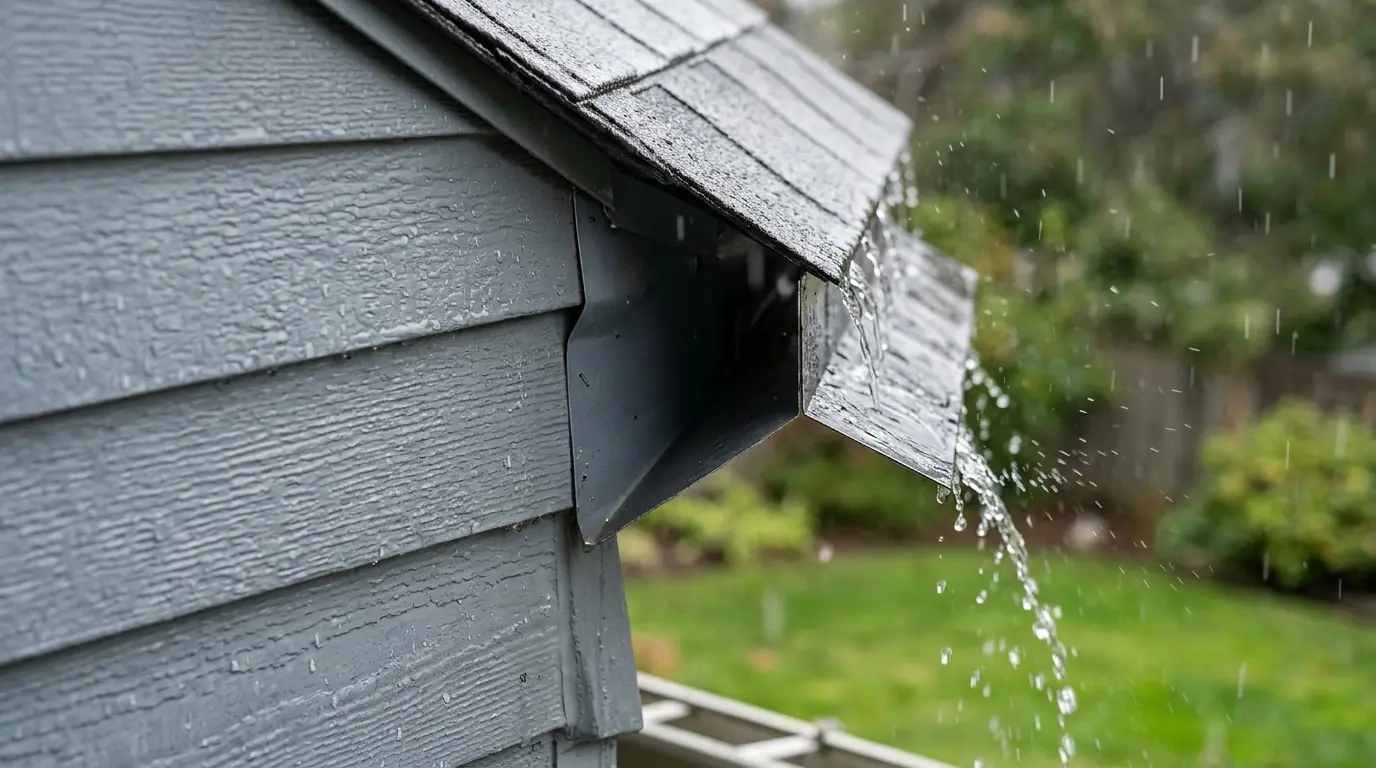
Step flashing is a series of small L-shaped pieces woven in with each course of shingles where a roof slope runs alongside a wall, such as the side of a dormer. Headwall or apron flashing is a single long piece where a roof slope ends against a wall, like a porch roof meeting the house. Drip edge runs along the eaves and rakes to guide water into the gutter. Kick-out flashing sits at the bottom of a roof-wall joint and turns water away from the siding.
Each one has a specific job and a specific way it laps with the shingles and the wall's weather barrier. Water always flows down, so every piece has to sit under the piece above it and over the piece below. When that order gets reversed, often during a siding or window job, the flashing funnels water behind itself instead of shedding it, and the damage stays hidden inside the wall for a long time.
How flashing repair is done
Real flashing repair usually means opening the joint. We remove the shingles along the affected area and, where needed, pull back the bottom courses of siding or trim. That lets us see the wall's weather barrier and the old flashing. We replace rusted or bent pieces with new metal, lap everything in the correct order, add kick-out flashing where it is missing, and then reinstall shingles and siding. You see photos of every layer.
- Remove shingles along the joint
- Pull back siding or trim where needed
- Check the wall's weather barrier for damage
- Install new step or apron flashing in order
- Add kick-out flashing at the eave end
Why caulk is not a flashing repair
A common shortcut is to run a bead of caulk along the top of the flashing or where the shingles meet the wall. It may slow a leak for a season, but caulk shrinks, cracks and pulls away under sun and cold. Worse, it can trap water that gets behind the flashing from above. We use sealant only where it belongs, as a backup on fasteners and laps, never as the main barrier.
If we open a joint and find years of caulk layered over failed flashing, we remove it, clean the surfaces and do the repair properly. Sometimes that reveals soft sheathing or rotted wall framing behind the old flashing. We show you what we find and explain what it takes to fix it, so the new flashing has a solid surface to seal against and lasts as long as the roof does.
Flashing problems after siding or window work
Many of the flashing leaks we trace started with other trades. When siding is replaced, installers sometimes cut or bend the step flashing, leave out the kick-out piece, or tuck the new siding behind the flashing instead of over it. When a window is added near a roof line, the flashing above it may not tie into the roof correctly. If your leak began after exterior work, tell us, because it points us to where to look first.
Signs your flashing is failing
Stain along a wall
Water marks on an interior wall below where a roof meets the house often trace back to failed step flashing.
Rot at siding bottom
Soft or swollen siding at the low end of a roof-wall joint often means kick-out flashing is missing or failed.
Rusted metal visible
Rust streaks or flaking on exposed flashing mean the metal is thinning and will soon let water through.
Thick caulk lines
Heavy layers of caulk along a wall joint usually mean someone has been patching a flashing leak for years.
Gaps behind shingles
Shingles pulled away from a wall or dormer side show the flashing beneath is loose, bent or missing.
Peeling paint on trim
Paint that peels repeatedly on trim beside a roof line suggests water is soaking in from a flashing gap above.
How we handle flashing repair
Call and share history
Call (360) 803-6405 and tell us where the leak shows and whether any siding, window or roof work happened recently near that area.
Inspect the joint
Our roofer checks the flashing from the roof and, where possible, the inside wall or attic to find where water gets behind the metal.
Open the joint
We remove shingles and pull back siding or trim along the joint so we can see the old flashing and the wall barrier behind it.
Replace and relap
New flashing goes in lapped in the correct order with the shingles and wall barrier, plus kick-out flashing wherever it is missing.
Close up and check
We reinstall shingles and siding, seal fasteners, clean up and show you photos of the new flashing before it was covered.
Flashing repair costs around Vancouver
Flashing repair prices depend on how long the joint is, whether siding has to come off, and whether there is rot in the wall or decking behind it. A short kick-out fix is quick. A full dormer side with siding removal takes more time. The ranges below are typical for 2026 in the Vancouver and Portland-metro area. Your real number comes after we open things up.
| Job | Typical range |
|---|---|
| Kick-out flashing add or replace | $435 to $760 |
| Step flashing along one wall | $790 to $1,580 |
| Headwall or apron flashing | $640 to $1,370 |
| Rotted sheathing behind flashing | $385 to $1,190 |
Joint length, siding type, access height and any rot found behind the old metal move the price most. See every service side by side in the roofing price guide.
Flashing and long Vancouver rains
Vancouver's rain mostly comes as long, steady drizzle from October through May, and that is exactly the kind of weather that finds flashing gaps. Water runs down a wall for hours, and if the step flashing or kick-out is missing, it soaks into the siding and sheathing a little at a time. Many 1990s and 2000s homes in Cascade Park, Mount Vista and Fishers Landing were built with dormers and roof-to-wall joints, and missing kick-out flashing is common on houses from that era.
Gorge winds push rain sideways into those same joints. On older homes near Hough and Esther Short, we often find flashing that has been repaired many times over, layered with caulk. A clean, properly lapped repair puts an end to that cycle. In Camas and Washougal, where the east wind hits hardest, we pay extra attention to the joints on the east and north faces. Along the rural north county, shop and barn roofs that tie into older walls often need new headwall flashing as well.
Flashing Repair questions
How long does flashing repair usually last?
When it is lapped correctly with quality metal, flashing repair should last as long as the shingles around it, often much longer. Failures usually come from installation errors, not the metal itself. Caulk-only fixes may last one or two seasons. A proper repair that opens the joint and relaps the flashing is built to last.
Does flashing repair require removing siding?
Often, yes, at least the bottom courses along the roof line. Step flashing is supposed to sit behind the siding and the wall's weather barrier, so reaching it means pulling back some siding or trim. We remove only what we need, protect it, and reinstall it. If siding is damaged, we let you know before we replace anything.
Is flashing repair different from chimney flashing repair?
Yes. Wall and step flashing tie into wood-framed walls and siding. Chimney flashing ties into masonry, which means cutting reglets into mortar joints, installing counter-flashing, and sometimes building a cricket behind the chimney. The materials and methods are different, so we treat them as separate jobs with separate pricing.
Can flashing repair fix water stains on an interior wall?
If the stain comes from water getting behind roof-to-wall flashing, yes, repairing the flashing stops the source. The stained drywall or paint inside will still need cleanup or repainting once it dries out. We check the wall cavity for wet insulation or rot while the joint is open so you know if more work is needed.
Work that often goes with it
Chimney Flashing & Cricket Repair
New step, counter and apron flashing around brick or framed chimneys, plus crickets that stop water pooling behind them.
See the detailsRoof Leak Repair
Leak tracing and repair for stains, drips and attic moisture. We follow the water back to where it actually enters the roof.
See the detailsFascia & Soffit Repair
Replacing rotted fascia boards and damaged soffit panels at the roof edge, then sealing the gaps that let in water and pests.
See the detailsFlashing Repair around Vancouver
Our crews do this work across Clark County and the Portland side, including:
Call about flashing repair
Phones are answered 24/7. Tell us what you are seeing and we will set a time to look.